Time Required: 20 minutes
Tools Required: Flathead screwdriver (small), Vice grips (optional)
Cost: $120.00
Parts: Gas Strut Boot Hinge
- PR55888PA or PR55888PB
In this article, I will show you how to replace the trunk struts on a 2004 Bentley Arnage. This repair applies to all Bentley Arnage and Rolls-Royce Silver Seraph cars across all model years (with a few minor exceptions). Be sure to double-check the part numbers at the Heritage Bentley website to make sure you order the correct parts for your specific model.
As with all repairs, always follow proper safety precautions. Wear safety glasses, disconnect the battery, brush your teeth, and consult a professional for additional help. Remember, I am just a guy on the internet and my advice is worth exactly what you paid for it. I am not an automotive mechanic, I am sharing my experience and I hope you find it helpful. While I make every effort to make sure the information is accurate, follow my advice at your own risk. Now- let’s tear apart a Bentley!
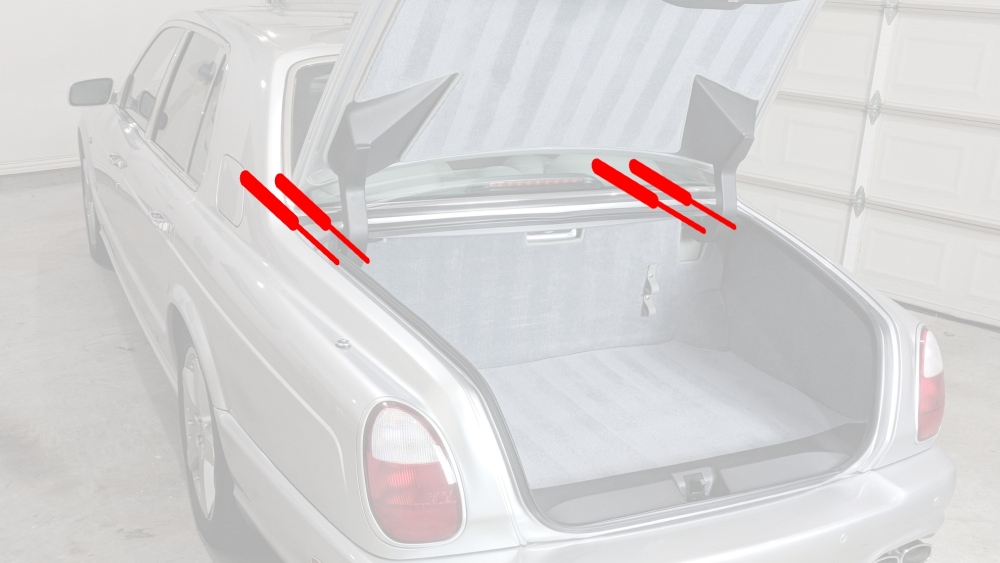
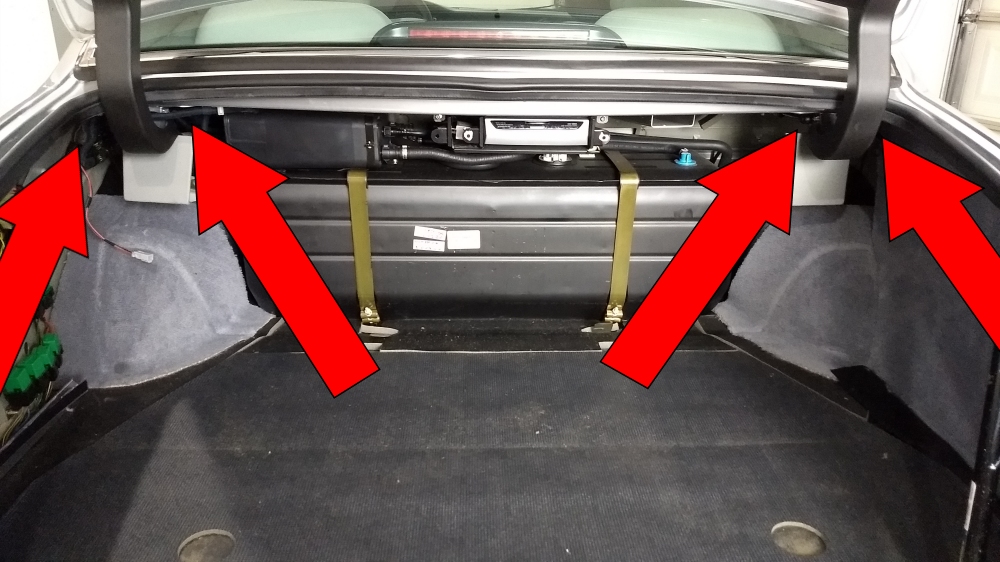
If the trunk (or the boot as it’s called in the UK) lid does not remain upright when open, or if the lid does not automatically pop open when the electronic switch is pushed, the struts have likely worn out. These parts are not designed to last forever so they will need to be replaced. The car contains four of these struts. They’re located in the rear of the car just underneath the parcel shelf, two on the left and two on the right.
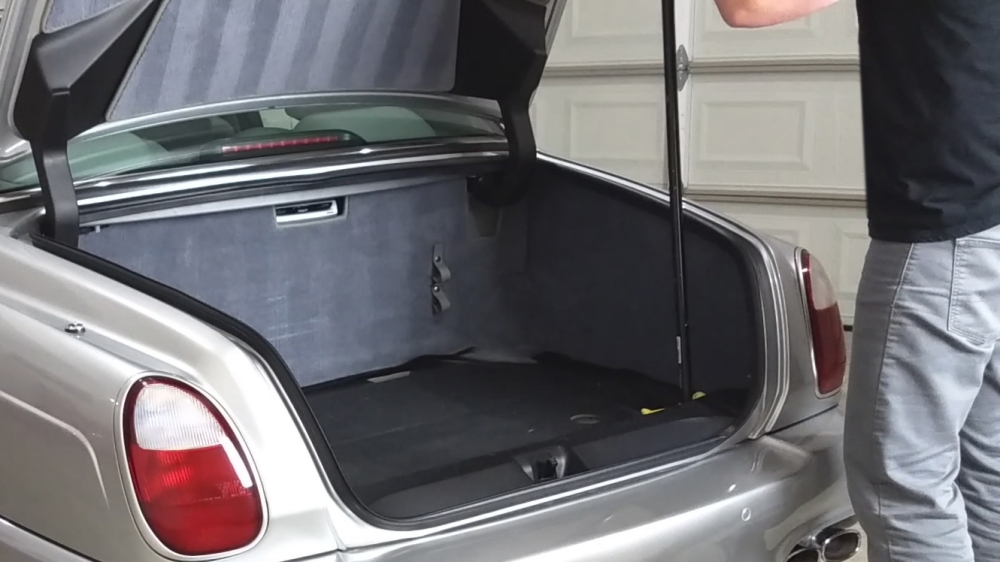
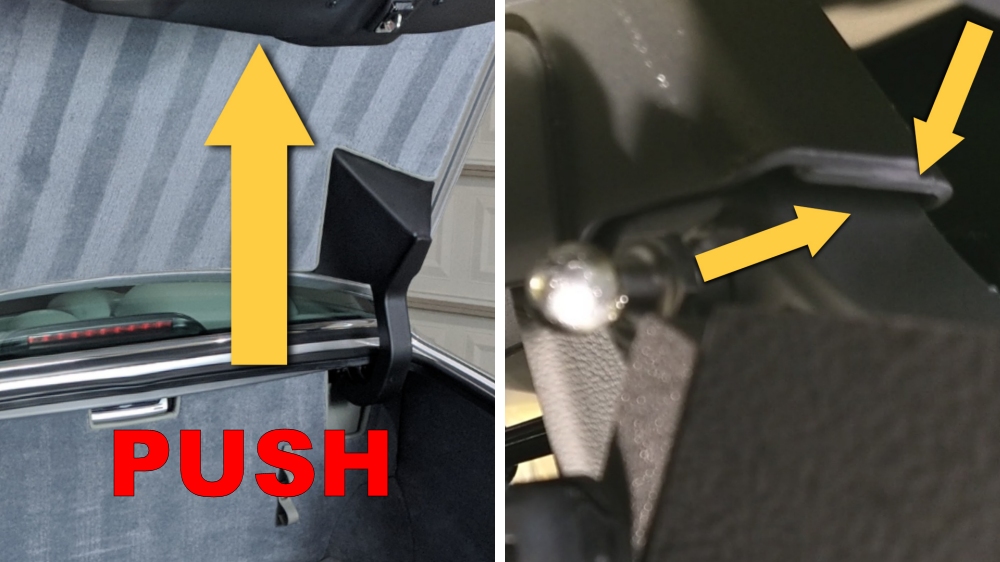
The first step to access the trunk struts is to open the trunk and remove the carpet. Use a pole to prop the trunk open.
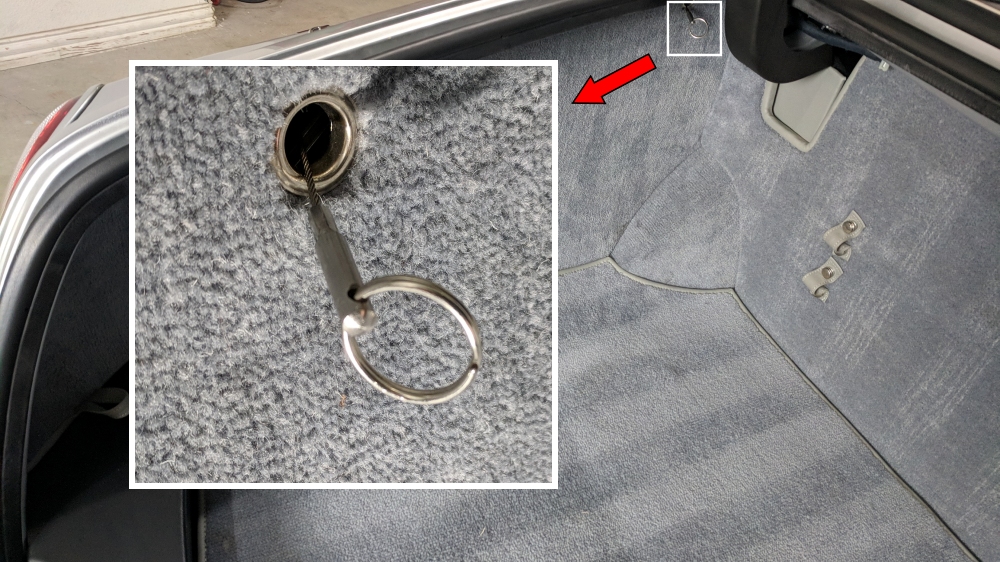
The next step is to remove the (left) side and rear trunk panels. In order to remove the side panel, remove the manual fuel door release ring. This is removed just like a keychain ring.
After the ring has been removed, remove the side panel. It takes some muscle to remove this part. Once the side panel has been removed, remove the back panel. Start by pulling at the top, near the DVD navigation unit.

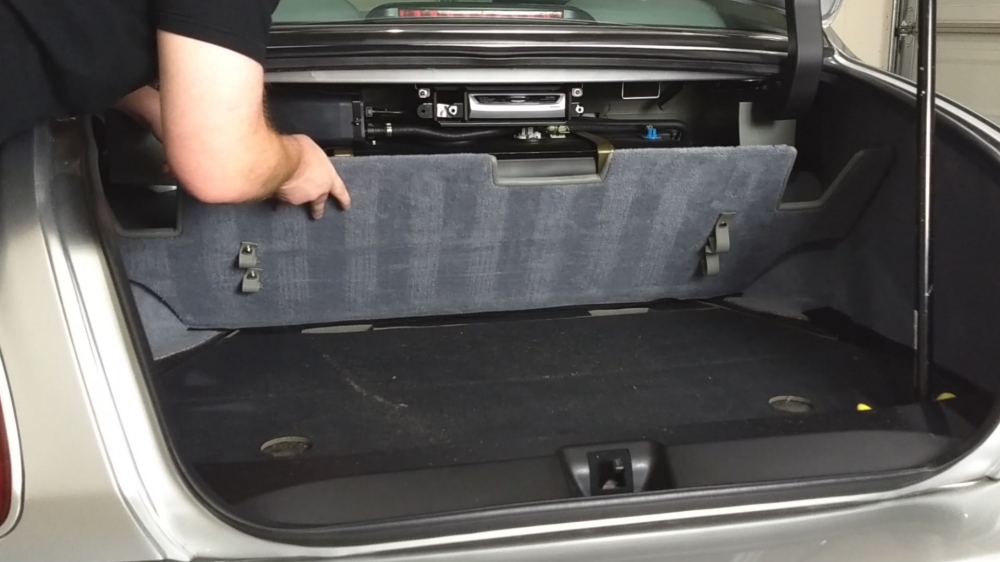
Fold the panel downward to access an electrical connection on the left-hand side. Disconnect the harness and remove the panel from the car.
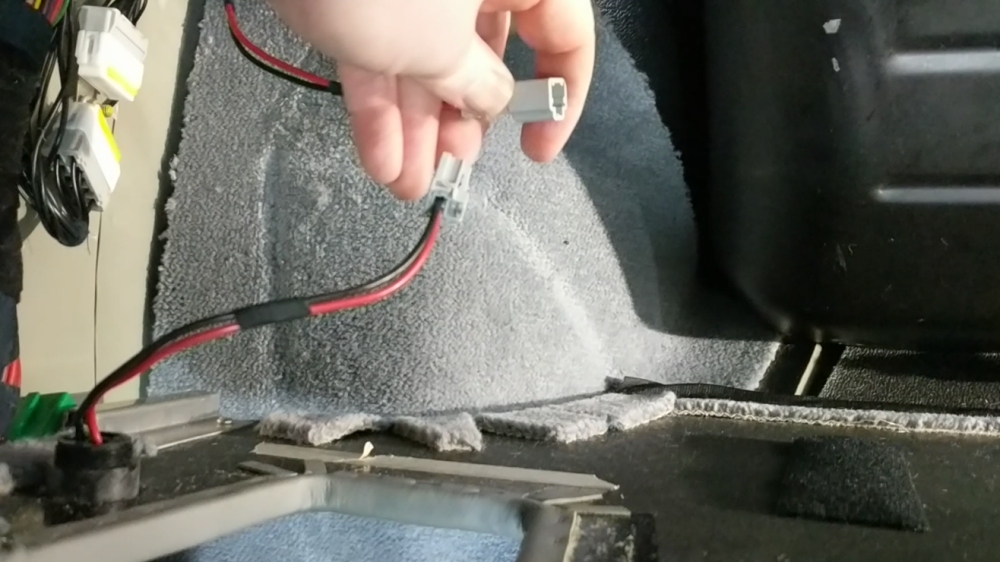
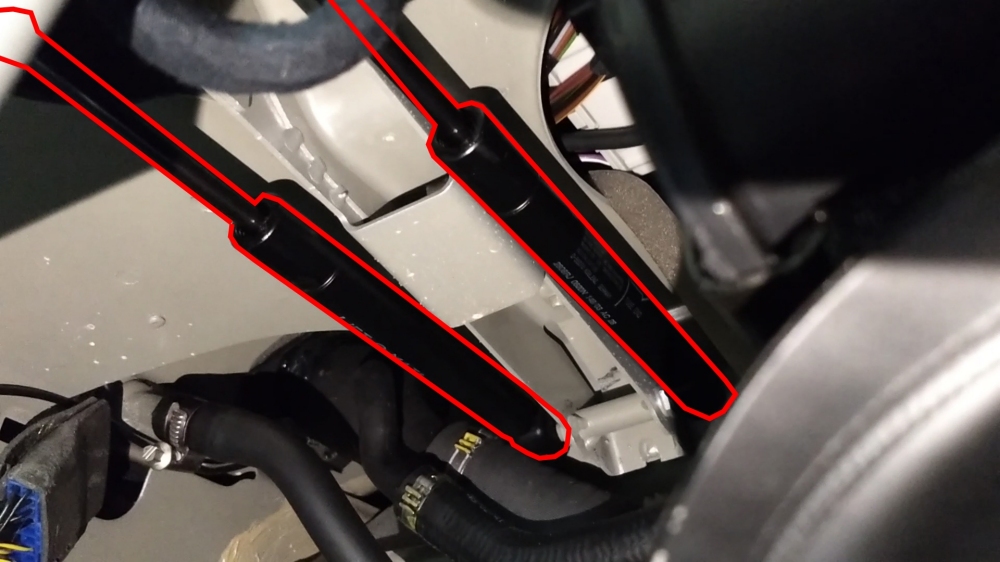
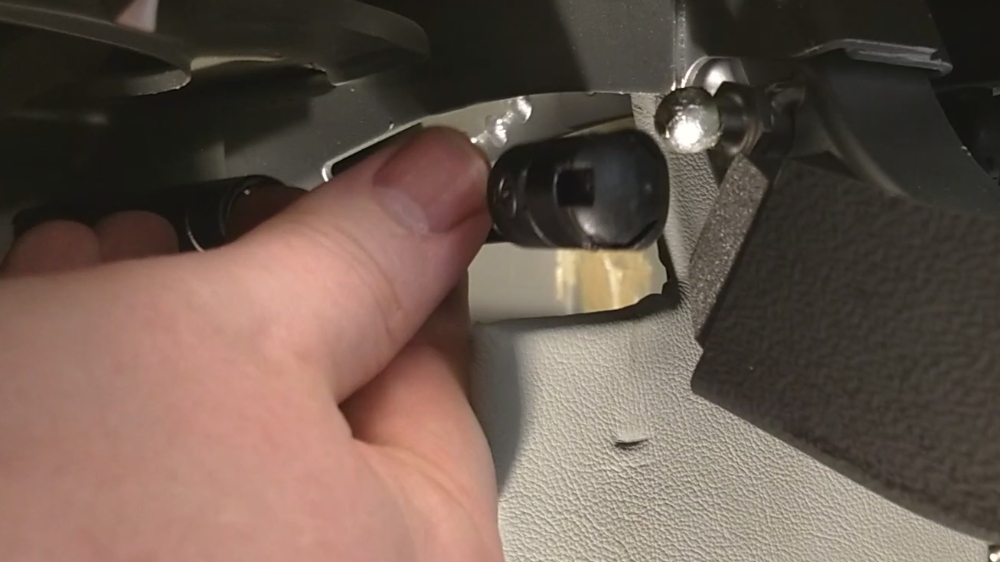
The gas struts are now visible underneath the parcel shelf. I put vice grips on the inner right strut as an extra safety precaution.

It is strongly recommended to replace all four struts at the same time when you do this repair. Replace the struts in the following sequence:
- Left outer strut
- Right outer strut
- Left inner strut
- Right inner strut
With a small flat-head screwdriver, slide the tip into the small metal clip to release the strut from the pivot ball. You want to pull the metal clip away from its position (you do not need to fully remove it). The first strut will have the most resistance, but as they are replaced, it should get easier. The procedure is the same for the other end of the strut.
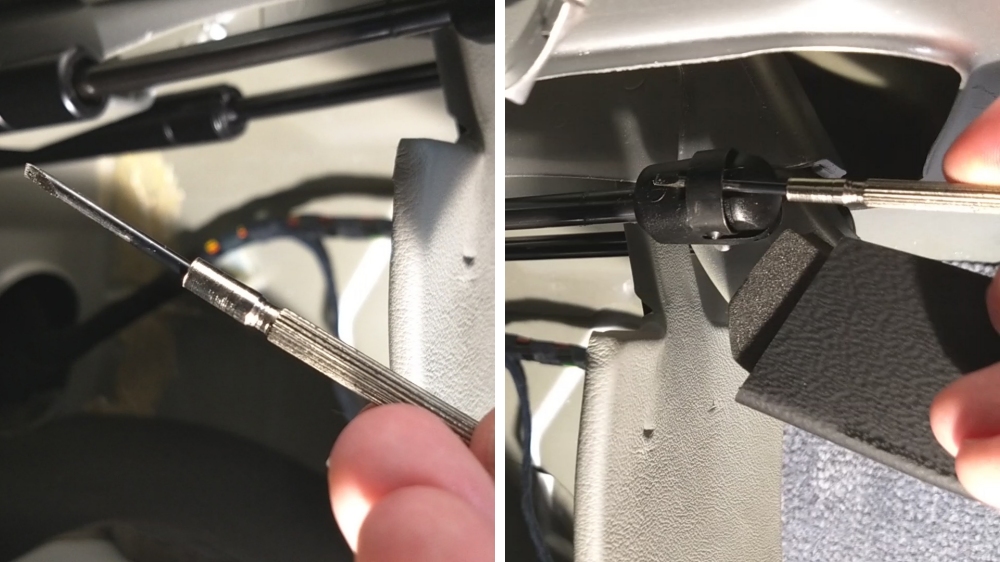
Once you’ve removed the strut, put the replacement strut in place and snap the end of the strut onto the furthest-most pivot ball first. Then connect the front (closer) pivot ball. It will likely be difficult to make this connection because the strut is fully extended and about two millimeters of clearance is needed to snap the strut into place. By pushing the trunk lid upward, you can gain a little extra space to fit the strut on the pivot ball. A little rubber stopper compresses just enough to increase the distance of the pivot ball.
Once the strut is securely in place, repeat the procedure for the other struts (in the sequence mentioned above). After all four struts have been replaced, remove the support pole (and vice grips) and the lid should remain open. Pressing down on the lid should be met with some resistance. Close the trunk completely and press the release button; the trunk should opens automatically.
Now, put the car back together. Start by reinstalling the back panel, side panel, and manual fuel release ring. Remember to connect the electrical harness. To make installation of the side panel easier, I used a piece of string to slide through the manual fuel door release hole. This allowed more freedom to move the panel around without worrying about the small cable popping out of place.
As you can see, this is a super simple DIY project. If I had to do this again, it would probably take me 15 minutes. This is definitely a repair that you don’t need to spend a lot of money for labor to have done.
The parts are about $30 per strut, so approximately $120 total. The parts used in my video were provided by IntroCar. I hope to do more reviews and continue working with IntroCar to build a knowledge-base of how-to’s and DIY articles for the Bentley community. The struts used in this article can be found here: PR55888PB – Gas Strut Boot Lid.
Notes:
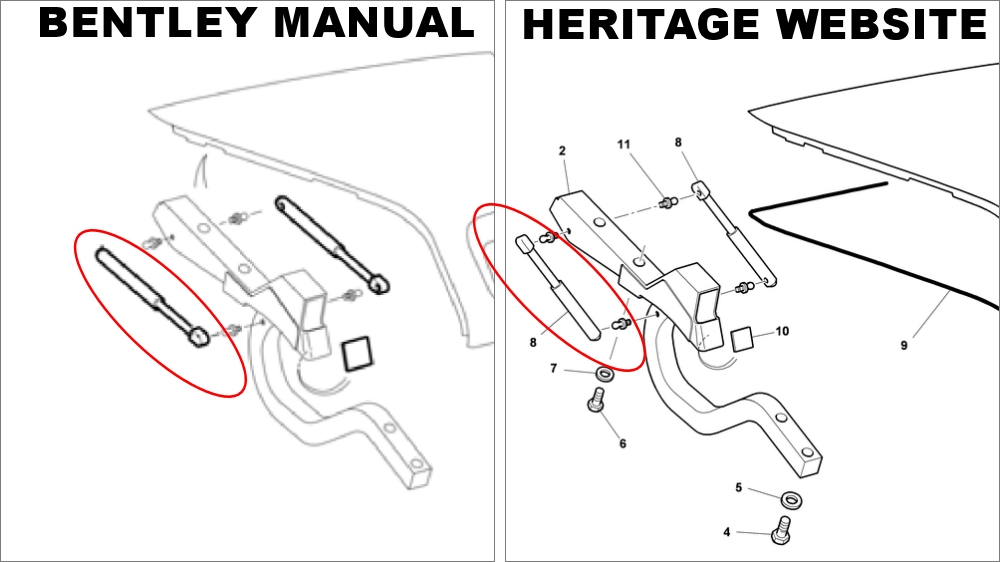
There appears to be two versions of the installation drawings for the strut replacement procedure. On the Heritage Bentley website, the exploded part drawing shows the struts with the wider cylinder section close to the hinge. Alternatively, the manual shows the piston-end close to the hinge. The instructions above are based on the Bentley shop manual, so the struts were installed accordingly. It is also the same position that the removed shocks were located in my car.
For technical information and shop manuals, visit: erWin Online for Bentley.
If this repair was helpful, please leave a comment below.
I found this very interesting I was looking where the struts go after studying the video I am now confident in doing the replacement I thought there was only 2 struts but surprised there is 4 so now ordered 4 for my Seraph thank you for your kind support , Mr.N.M.Mason